
This notebook contains an excerpt from the Python Programming and Numerical Methods - A Guide for Engineers and Scientists, the content is also available at Berkeley Python Numerical Methods.
The copyright of the book belongs to Elsevier. We also have this interactive book online for a better learning experience. The code is released under the MIT license. If you find this content useful, please consider supporting the work on Elsevier or Amazon!
< 1.3 Managing Packages | Contents | 1.5 Logical Expressions and Operators >
Introduction to Jupyter Notebook
You have already used the IPython shell to run the code line by line. This is good, but if you have a more lines of codes and want to run it block by block and share it easily with others, the Ipython shell is not a good option. In this section, we will introduce another option - Jupyter notebook, that we will use for the rest of the book. From the Jupyter notebook website:
The Jupyter Notebook is an open-source web application that allows you to create and share documents that contain live code, equations, visualizations and narrative text. Uses include: data cleaning and transformation, numerical simulation, statistical modeling, data visualization, machine learning, and much more.
Jupyter notebook is running using your browser, it could run locally on your machine as a local server or remotely on a server. The reason it is called notebook is because it can contain live code, rich text elements such as equations, links, images, tables, and so on. Therefore, you could have a very nice notebook to describe your idea and the live code all in one document. Thus Jupyter notebook becomes really popular way to test ideas, writing blogs, papers and even books, for example, this book is written entirely within Jupyter notebook. Of course, it has many other advantages, and we will only cover the basics of the Jupyter notebook to get you started.
Start Jupyter notebook
We saw before that we could start Jupyter notebook by typing the following command in our terminal in the folder where you want the notebooks are:
jupyter notebook
Then you will see the Jupyter notebook dashboard in the browser, the default address is: http://localhost:8888, that is at the localhost with port 8888 as shown in the following figure (if the port 8888 is taken by other Jupyter notebooks, then it will automatically use another port). This is essentially creating a local server to run in your browser. When you navigate to the browser, you will see a dashboard. In this dashboard, you can see some important features that labeled in red: you can see all the files in the current folder, show all the running notebooks, and create a new notebook or others such as text file, folder and a terminal. We can create a new Python notebook by selecting the Python 3, usually this is called Python kernel. You can use Jupyter to run some other kernels as well, for example, in the following figure, there are Bash and Julia kernels that you could run as a notebook, but you need to install them first. We will use the Python kernel, therefore, choose Python 3 kernel.

Within the notebook
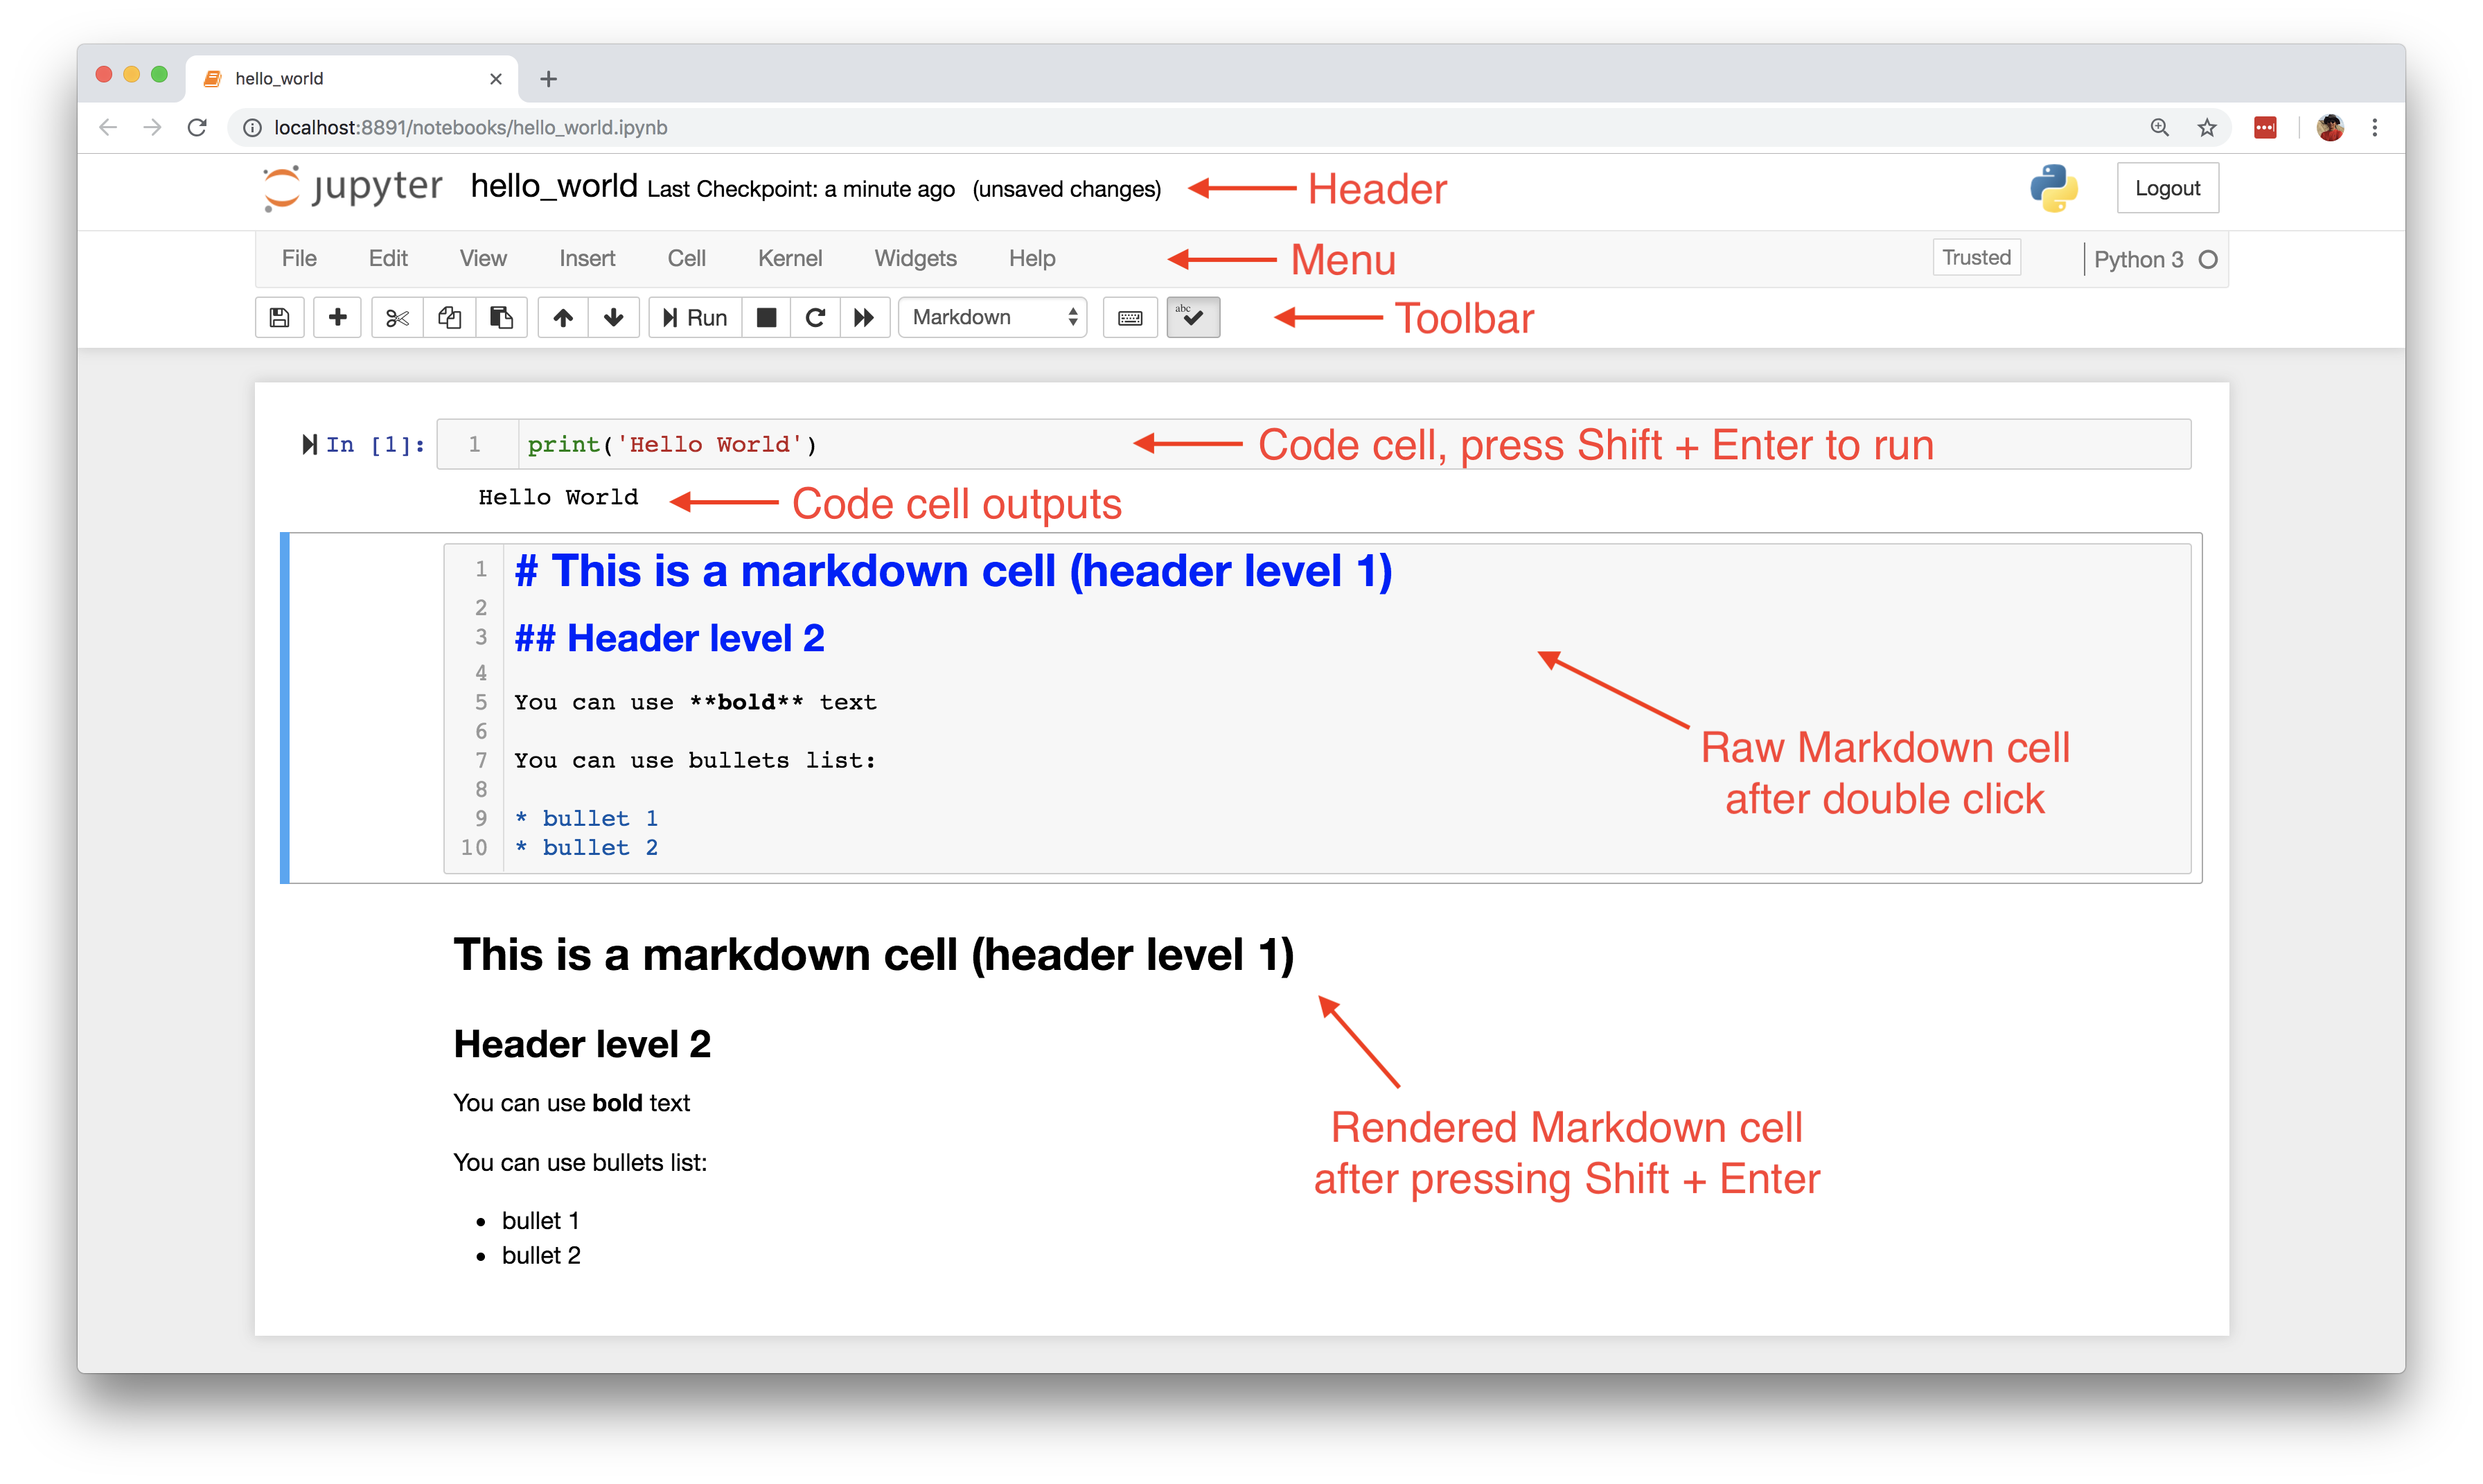
After you create a new Python notebook, it will look like the following figure. The toolbar and menu is self-explanatory when you hover your cursor to the toolbar, it will show you the function of the tool and press the menu, it will show you the drop down list. The most important things to know the Jupyter notebook are the cells and the different types. In the notebook, a cell is a place where you can write your code or text in it, and run this cell to only execute code within this cell block. Two important cell types are code and markdown, the code cell is where you type your code and can run the code in it. The markdown cell is a place you can type the description in rich text format, see the following figure as an example. You can search for ‘Markdown cheatsheet’ to get a quick start with markdown. To run the code or renter the markdown in the notebook is simple, just press Shift + Enter.
In the notebook, you can move the cell up or down, insert or delete cell, and so on. There are many other nice features about Jupyter notebook, we won’t talk too much here, but you can find many tutorials online to learn more.
Shut down the Jupyter notebook
Closing the browser will not close the Jupyter notebook, since the server is still running. You can reopen the previous address in a browser. To completely shut down it, we need to close the associated terminal that you launch the Jupyter noteobok.
Close a notebook
When you close the notebook browser tab, the notebook actually is not closed, it is still running in the background. If you need completely close a notebook, go to the dashboard, and check the box before the notebook, and you can see a shutdown option in the toolbar above, this is the correct way you close a notebook completely.
Ok, now you have the basic knowledge to launch and run a Jupyter notebook, and it is time to continue to learn Python.
< 1.3 Managing Packages | Contents | 1.5 Logical Expressions and Operators >